Contemporary basketry
Making a basket is probably the oldest weaving method that goes back thousands of years. Young branches and strong grasses were used to make small handy baskets for hunting, fishing, carrying, and More »

Fabrics for Fashion: Part 1
Without fabric there would be no fashion. Whether woven, knitted, printed, embroidered or bejewelled, textiles are crucial to the eloquence of apparel and fundamental to the fashion design process. We are presenting More »

Rosalind Wyatt: Text and Textile
The versatility of textiles and the wide spectrum of usage of fabrics and threads are enormous. Rosalind Wyatt, London based visual artist and calligrapher is well aware of it and use it More »

Paulina Bartnik’s embroidered brooches
Paulina Bartnik is a Polish textile artist based in Lublin. Her work amazes equally art lovers, textile crafters and bird enthusiasts. She creates beautifully detailed bird brooches using techniques of needle felting and More »
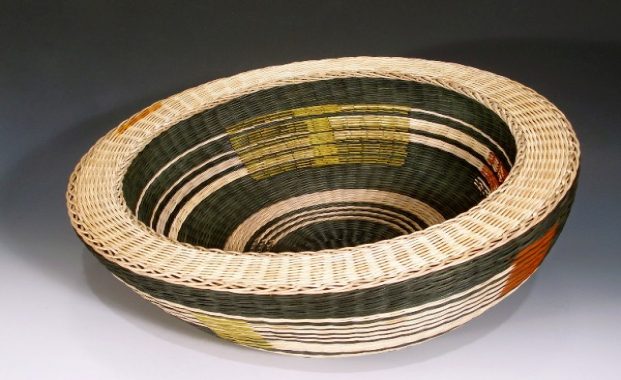
Contemporary basketry

Making a basket is probably the oldest weaving method that goes back thousands of years. Young branches and strong grasses were used to make small handy baskets for hunting, fishing, carrying, and storing items. Weaving baskets was a quick way to produce the tool when needed and with materials available nearby. Over the centuries, making process and materials became more sophisticated and designs more intricate.
Fabrics for Fashion: Part 1
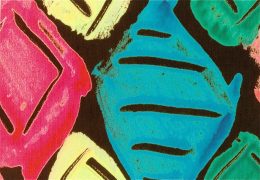
Without fabric there would be no fashion. Whether woven, knitted, printed, embroidered or bejewelled, textiles are crucial to the eloquence of apparel and fundamental to the fashion design process. We are presenting very few textile designers who work mostly in the fashion industry. Their designs can be seen on the catwalks of all major worldwide fashion shows and fashion showrooms.
Vicky White: Art, science and love for animals
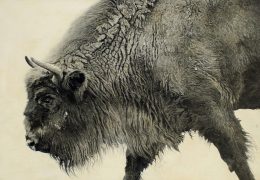
Vicky White is Surrey-based artist specialised in highly realistic illustrations of wild and domestic animals. She studied Scientific and Natural History Illustration at the Blackpool and the Fylde School of Art. In 2005 she has completed her master’s degree at the Royal College of Art, London.
Rosalind Wyatt: Text and Textile
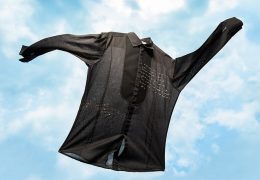
The versatility of textiles and the wide spectrum of usage of fabrics and threads are enormous. Rosalind Wyatt, London based visual artist and calligrapher is well aware of it and use it in her creative work to put two seemingly incomparable things together: text and textiles. And it works very well.
Paulina Bartnik’s embroidered brooches
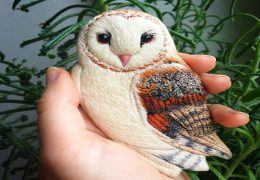
Paulina Bartnik is a Polish textile artist based in Lublin. Her work amazes equally art lovers, textile crafters and bird enthusiasts. She creates beautifully detailed bird brooches using techniques of needle felting and embroidery. Paulina graduated from the Academy of Fine Arts in Warsaw, but she is mostly self-taught in the field of embroidery.
Sea Style

Sea style themes have a special place in the decorator’s repertoire. The seaside is ever popular, while boats and shells, and fish and starfish make pretty, stylish design motifs, and there is something tranquil and restful about the thought of far blue horizons.
How to make an egg tree
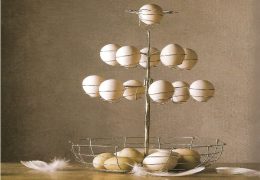
The design for this whimsical egg tree derives from eastern European folk art. The basket at the bottom is traditionally used for bread. The tree makes a spectacular centrepiece at Easter when filled with dyed or painted eggs. At Christmas, turn it into a decorative Christmas tree by putting night lights in the egg holders and filling the basket with presents or sweets (candies). Tinned copper wire has been used here as it is ideal for kitchenware. It is as malleable as copper wire and has the added advantage that it does not tarnish. The egg tree can, of course, be made from cheaper and more readily available wire. For a different finish it could be wrapped in natural-coloured string.
History of creative wirework

Wirework is an ancient art form, probably first practised by the Egyptians around 3000BC. Early examples have been discovered in the burial chambers of important people throughout the ancient world. In 2600BC, wire was used in gold and silver ribbons for entwining in the hair of courtly ladies in the Sumerian city of Ur. The art of wirework spread in various forms from Babylon to Baghdad, Damascus and Constantinople before finally reaching Europe.
Decorative kitchen tiles

Apart from their decorative function, washability and sturdiness are qualities which make kitchen tiles so suited not only to kitchens, but for other useful rooms like larders, utility rooms, mudrooms and laundries. In addition, the coldness of glazed and unglazed ceramic tiles helps keep worktops cool, ideal for bread and pastry making.
Directors’ Chairs
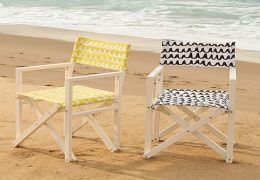
Apart from all the great movies made there, Hollywood is also responsible for the fame of one of the truly great chairs of all time, the directors’ chair. A design classic, it is light, portable, and remarkably comfortable. The design goes back to coffer-makers’ chairs of the 15th century and eventually to the Roman curule chair.